7-Pin RV Blade Connector: Wiring Diagram and Install Guide
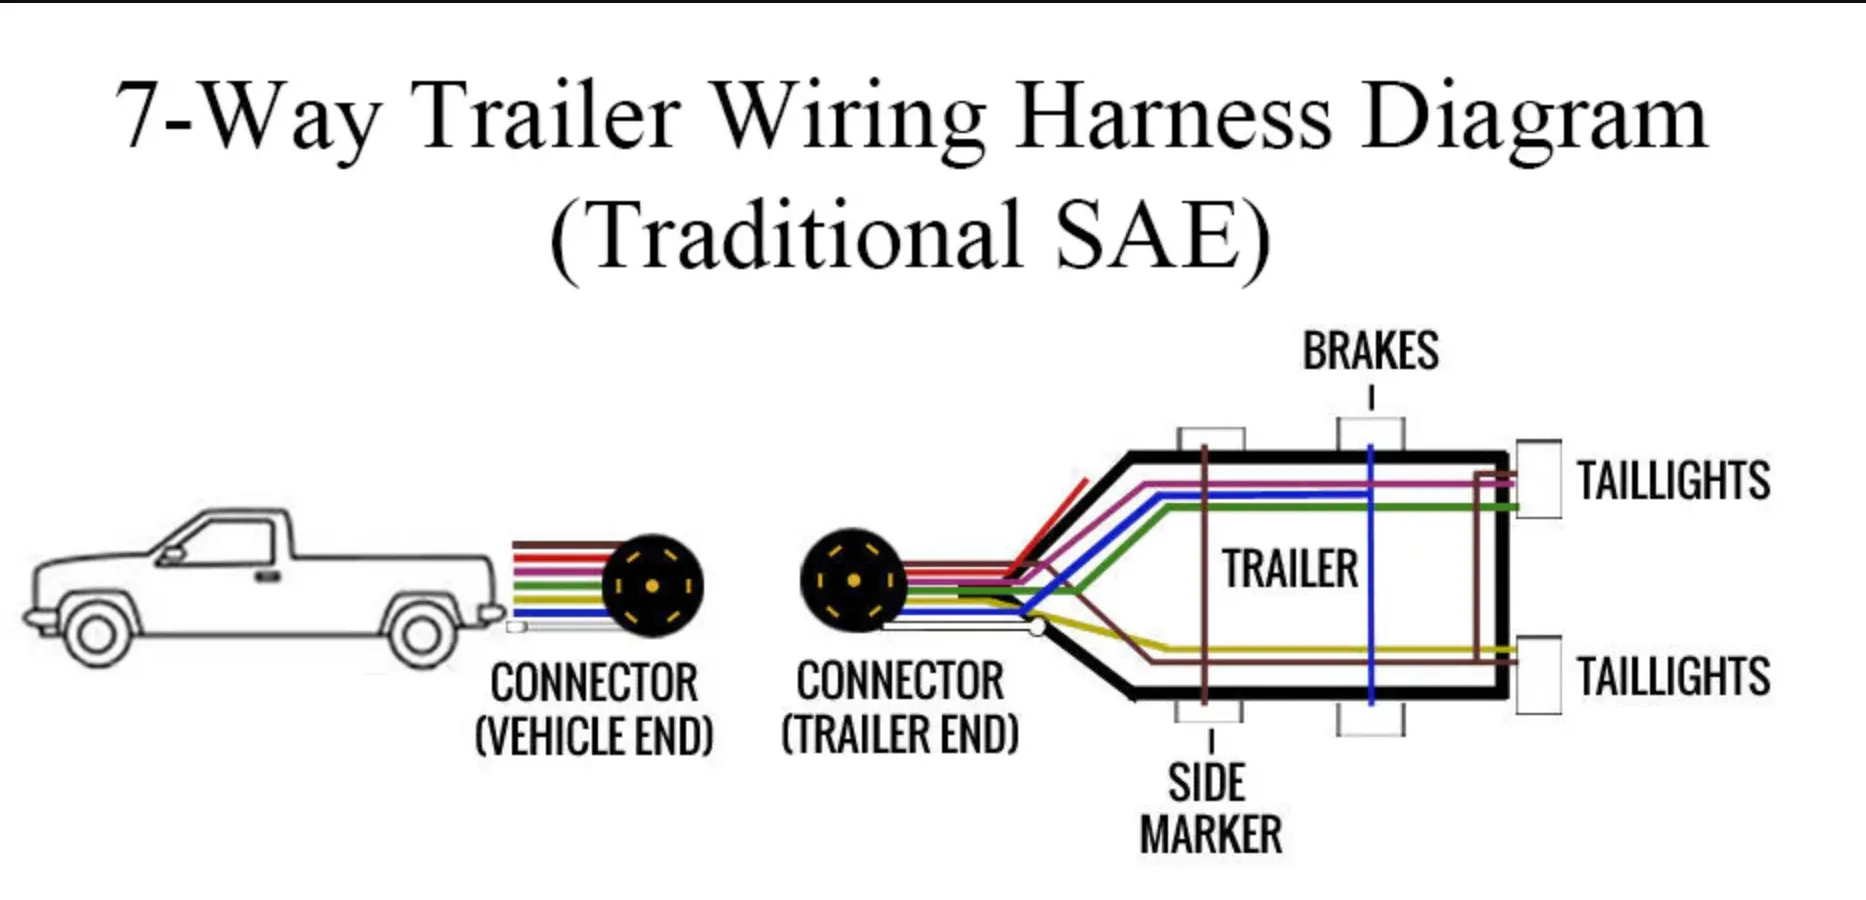
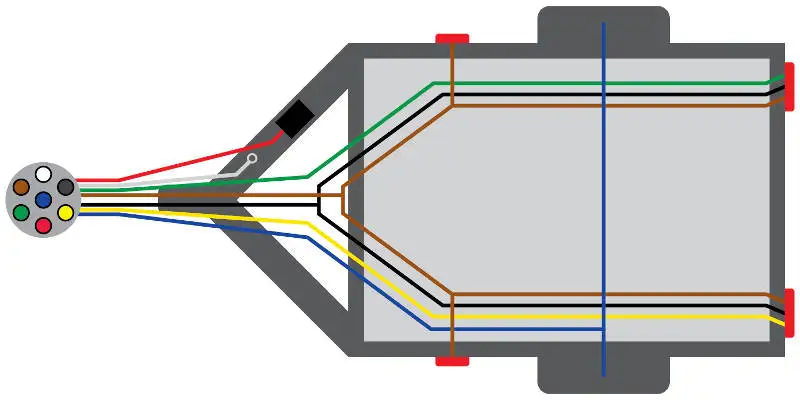
The 7-pin trailer connector uses this standard wiring: white (ground), brown (running lights), yellow (left turn/brake), green (right turn/brake), blue (electric brakes), red (12V auxiliary) and black (12V battery charge). Pin 1 sits at 12 o’clock on the RV blade connector with remaining pins numbered clockwise. This setup handles trailers up to 10,000 lbs with electric brakes—installation runs $50-150 at a shop or about 2 hours DIY. For complete color-coded diagrams including 4-pin, 5-pin and 6-pin options, see our trailer wiring diagram guide.
7-Pin Connector Basics
Understanding the standard 7-way connector.
Connector Types
Two main 7-pin styles exist:
RV Blade (Most Common)
- Flat blade contacts
- Standard on trucks and SUVs
- Available at any auto parts store
- Most trailers come with this style
Round Pin
- Cylindrical pin contacts
- Common on commercial and agricultural trailers
- Less common in consumer applications
- May need adapter for modern trucks
Why 7 Pins?
7-pin connectors provide:
- Running/tail lights
- Left turn/brake
- Right turn/brake
- Electric brakes
- Ground
- 12V battery charge
- 12V accessory power
This covers all trailer electrical needs including brakes.
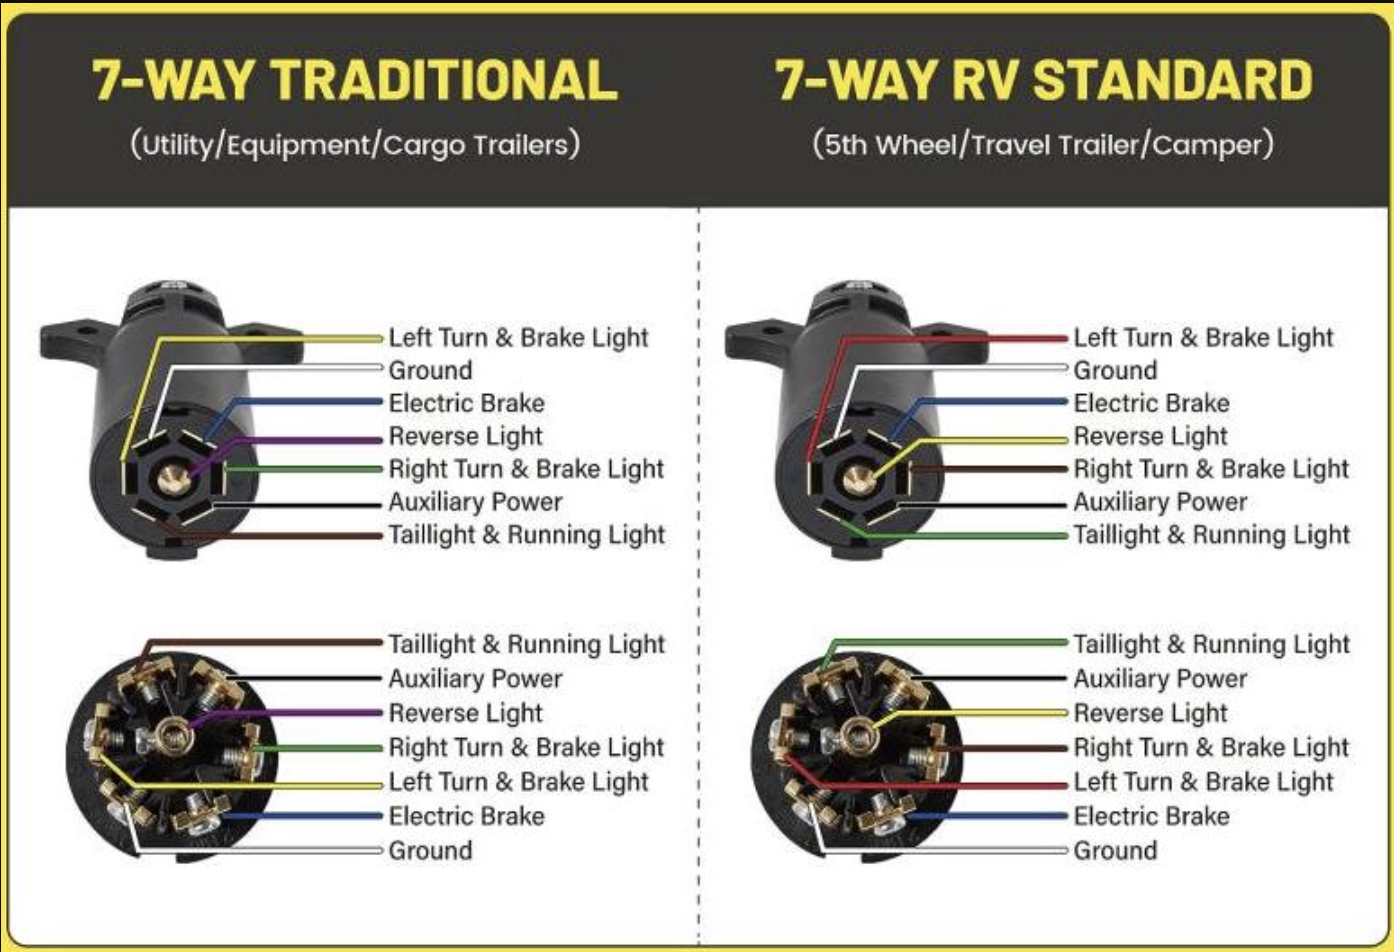
Pin Functions and Wiring
Standard wiring for 7-way RV blade connectors.
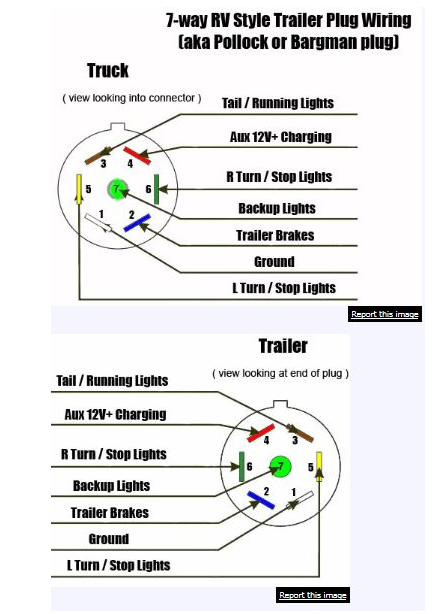
Pin Layout (Vehicle Side - Looking at Socket)
 ⬤ (Center - White/Ground)
 ⬤ ⬤
 (Blue) (Green)
 ⬤ ⬤
 (Yellow) (Brown)
 ⬤ ⬤
 (Red) (Black)
Wire Colors and Functions
| Pin Position | Wire Color | Function |
|---|---|---|
| Center | White | Ground |
| Upper Left | Blue | Electric trailer brakes |
| Upper Right | Green | Right turn/brake |
| Middle Left | Yellow | Left turn/brake |
| Middle Right | Brown | Tail/running lights |
| Lower Left | Red | 12V battery charge |
| Lower Right | Black | 12V accessory |
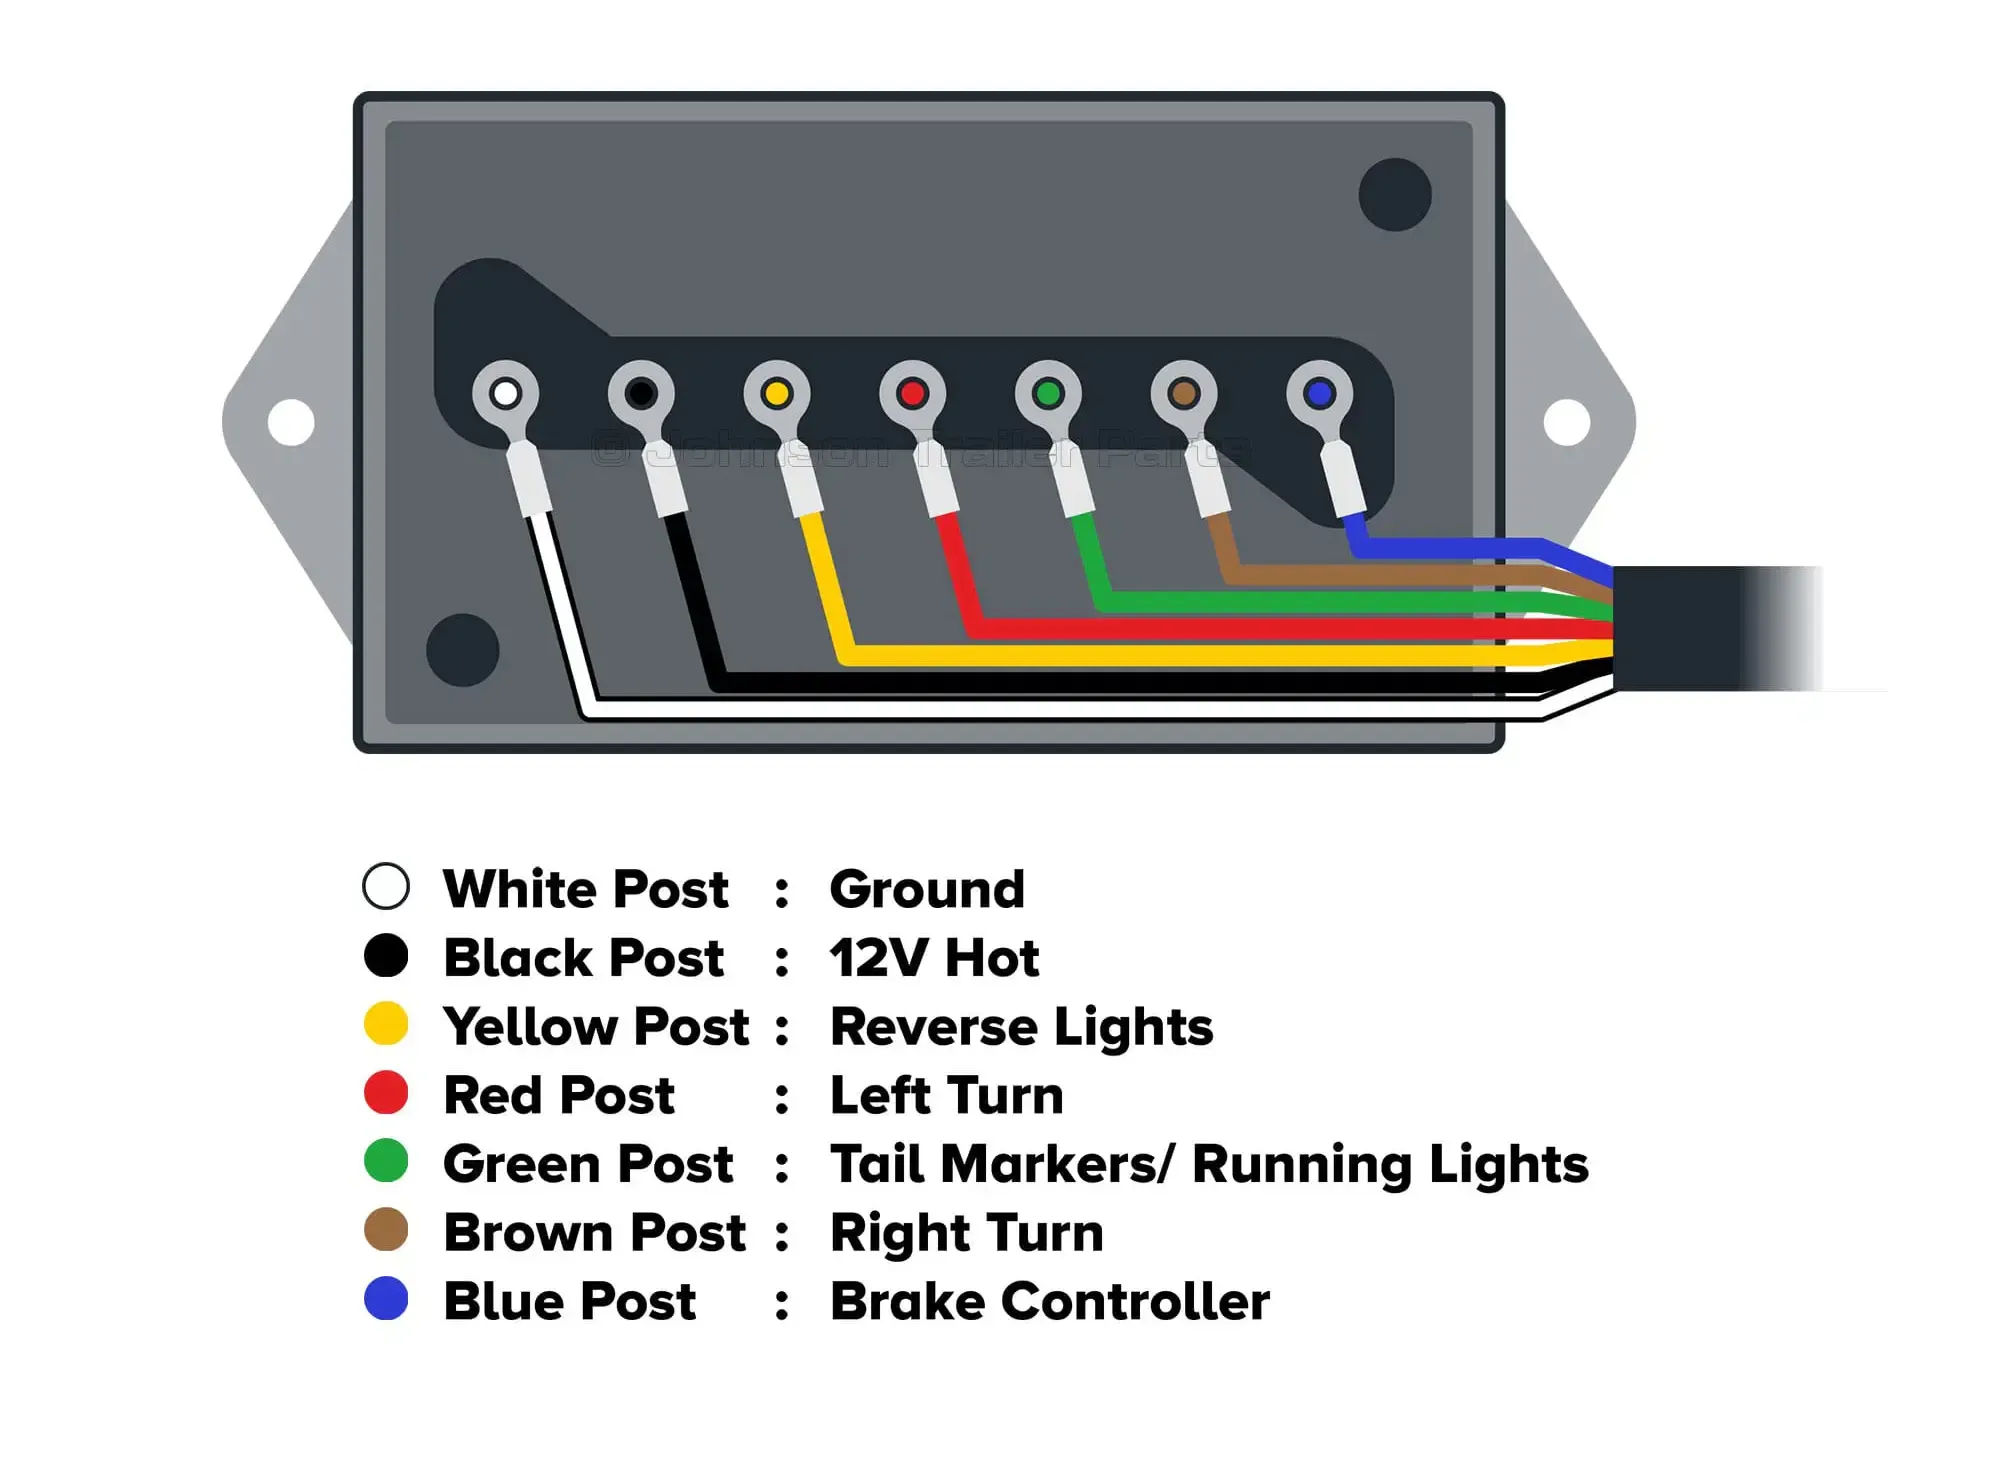
Function Details
Ground (White): Returns current to vehicle. Critical for all functions. Test with a voltage tester to verify good ground.
Electric Brakes (Blue): Carries brake signal from controller. Voltage varies with braking intensity. Use an automotive circuit tester to verify the brake signal.
Right Turn/Brake (Green): Powers right turn signal and brake light.
Left Turn/Brake (Yellow): Powers left turn signal and brake light.
Running Lights (Brown): Powers tail lights, side markers and license plate light.
Battery Charge (Red): Provides constant 12V to charge trailer battery. Hot when vehicle running. For trailer battery wiring options, see batteries in series vs parallel.
Accessory (Black): Provides 12V for trailer accessories. Often switched or fused separately.
How to Install a 7-Pin Trailer Connector
Proper installation ensures reliable operation.
Vehicle Side Installation
For vehicles with factory tow package:
- Connector usually pre-installed
- May just need plug adapter for your trailer
For vehicles without tow package:
- Choose installation method:
- Plug-in wiring harness (easiest, vehicle-specific)
- Universal splice-in kit
- Custom wiring (most work)
- Route connector wire:
- Through bumper or under vehicle
- Protect from heat, abrasion, moisture
- Allow for plug storage
- Make connections:
- Follow color codes precisely
- Use weather-resistant connectors
- Solder or crimp properly
- Install converter if needed:
- Required when vehicle has separate turn/brake
- Isolates vehicle electronics
- Provides proper trailer signals
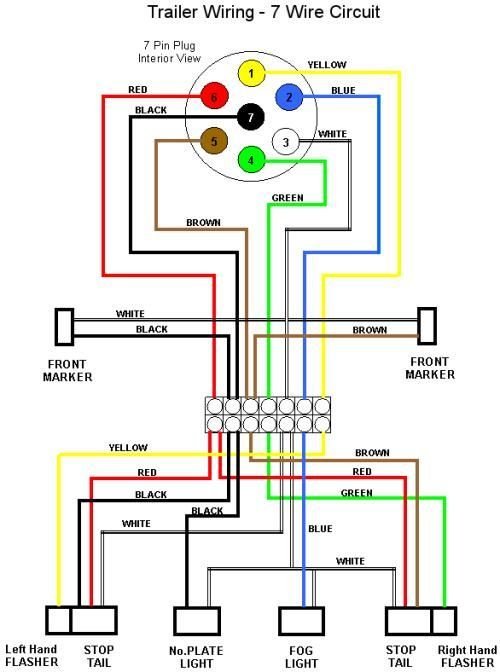
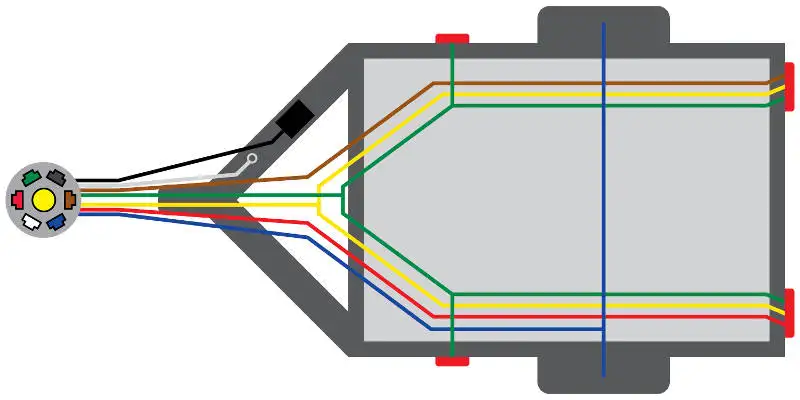
Trailer Side Installation
- Mount connector at tongue:
- Accessible for connection
- Protected from road spray
- Service loop for movement
- Run wiring through frame:
- Inside frame rail or conduit
- Away from moving parts
- Protected from damage
- Connect to each light:
- Match colors to functions
- Solid mechanical connections
- Weather-resistant splices
- Establish good ground:
- Scrape paint from contact area
- Use star washer
- Apply dielectric grease
- Run dedicated ground wire
Electric Brake Wiring
If trailer has electric brakes:
- Blue wire connects to brake magnets
- Brake controller required on tow vehicle
- Breakaway switch connects in brake circuit
- Test brake function before road use
Troubleshooting Common Problems
No Lights At All
Check in order with a multimeter:
- Vehicle fuse for trailer circuit
- Connector seating - fully engaged?
- Ground connection - clean and tight?
- Pin corrosion - clean connector
Running Lights Don’t Work
- Check brown wire continuity
- Verify power at connector with test light
- Check headlight switch position
- Test individual bulbs
Turn Signals Don’t Work
- Test at connector for power
- Check bulbs on non-working side
- Verify ground at each light
- Check for crossed wires
One Side Only
- Usually ground problem at that side
- Could be bad bulb
- Check wire continuity to that side
- Inspect for damaged wiring
Brakes Don’t Work
- Brake controller output - test blue wire voltage when braking
- Breakaway switch - pin fully inserted?
- Brake magnets - test for continuity
- Ground circuit - for brake magnets
Intermittent Problems
Usually connection issues:
- Corroded pins
- Loose connector
- Damaged wire (flexing causes open)
- Poor ground
Fast Flashing Turn Signals
Low circuit resistance:
- Burned out bulb
- LED lights need load resistor
- Bad ground causing high resistance
Adapters
When vehicle and trailer connectors don’t match.
Common Adapter Needs
| Vehicle Has | Trailer Has | Solution |
|---|---|---|
| 7-way blade | 4-way flat | 7 to 4 adapter |
| 4-way flat | 7-way blade | 4 to 7 adapter* |
| 7-way round | 7-way blade | Round to blade adapter |
| 7-way blade | 7-way round | Blade to round adapter |
*Note: 4 to 7 adapter provides lighting only - no brakes or charging
When Converters Are Needed
Signal converters required when:
- Vehicle has separate amber turn signals
- Trailer has combined red turn/brake
- Vehicle computer monitors trailer circuits
- LED trailer lights cause errors
Converter Installation
- Mount converter in protected location
- Connect to vehicle lighting wires
- Connect converter output to trailer connector
- Ground converter to vehicle chassis
Maintenance Tips
Keep your connectors working properly.
Before Each Trip
- Connect and test all lights
- Test brake function (if equipped)
- Check for visible damage
- Verify solid mechanical connection
Periodic Maintenance
- Clean contacts with electrical cleaner
- Apply dielectric grease
- Check for loose terminals
- Inspect wires for damage
Corrosion Prevention
- Always use connector cap when stored
- Apply dielectric grease to pins
- Keep connector elevated when not in use
- Repair any cracked housing immediately
Winter Care
- Extra cleaning after salt exposure
- Check connections more frequently
- Verify ground integrity (salt accelerates corrosion)
- Consider sealed connector upgrade
Frequently Asked Questions
Why do I need 7 pins if I only use lights?
You don’t necessarily - a 4-pin connector handles basic lights. But 7-pin provides electric brakes (important for heavier trailers), battery charging and accessory power. Most equipment trailers over 3,000 lbs should have brakes.
Can I use a 7-pin trailer on a truck with 4-pin?
Yes, with an adapter. You’ll have lights but no electric brakes or charging. Not recommended if your trailer requires brakes for safe stopping.
My trailer brakes don’t work but lights do - why?
The brake controller may be disconnected, faulty or not installed. Blue wire may be damaged. Breakaway switch may be tripped. Test for voltage on blue wire when pressing brake pedal.
Do I need to ground each light separately?
Best practice is yes. While frame ground can work, dedicated ground wires ensure reliability. Poor grounds cause most trailer light problems.
Why does my truck show “trailer disconnected” with trailer connected?
Modern trucks monitor trailer circuits. Causes include bad ground, LED lights without resistors or trailer connector not fully seated. May need load resistors or wiring check.
Related Guides
- Trailer Wiring Diagrams: Complete 4, 5, 6 and 7-Pin Guide - Color-coded diagrams for all connector types
- 5-Pin Trailer Connector Wiring - For trailers with surge brakes
- 6-Pin Trailer Connector Guide - For gooseneck and horse trailers
- Automotive Wiring Harness Repair - Fixing damaged trailer wiring
- How to Use a Multimeter - Testing trailer circuits
- Battery Series vs Parallel - Trailer battery configurations
Bottom Line
The 7-pin connector handles everything you need for equipment trailers - lights, brakes and power. Proper installation with good grounds and weather protection ensures reliable operation. Test all functions before each trip, maintain connections regularly and address problems promptly before they strand you on the roadside.