Briggs & Stratton 799583 Carburetor | E-Series Guide
The Briggs & Stratton 799583 carburetor powers the budget-friendly E-Series engines found on millions of entry-level push mowers. These 300E, 450E, 500E and 550EX engines run Murray, Yard Machines, Bolens and store-brand mowers. The carburetor is simple but has its own quirks.
Table of Contents
- Engine Applications
- Carburetor Identification
- Common Problems
- Replacement Guide
- Cleaning Procedure
- Troubleshooting Tips
Engine Applications
The 799583 fits Briggs & Stratton E-Series engines:
Engine Series:
- 300E (125cc)
- 450E (125cc)
- 500E (140cc)
- 550EX (140cc)
Common Mower Brands:
- Murray push mowers
- Yard Machines by MTD
- Bolens push mowers
- Hyper Tough (Walmart)
- Craftsman entry-level
- Weed Eater brand mowers
Engine Model Numbers:
- 09P602
- 09P702
- 093J02
- 08P502
[NEED REAL IMAGE: E-Series engine model number location]
These are vertical shaft engines designed for walk-behind mowers. The model number is usually on a label stuck to the engine shroud.
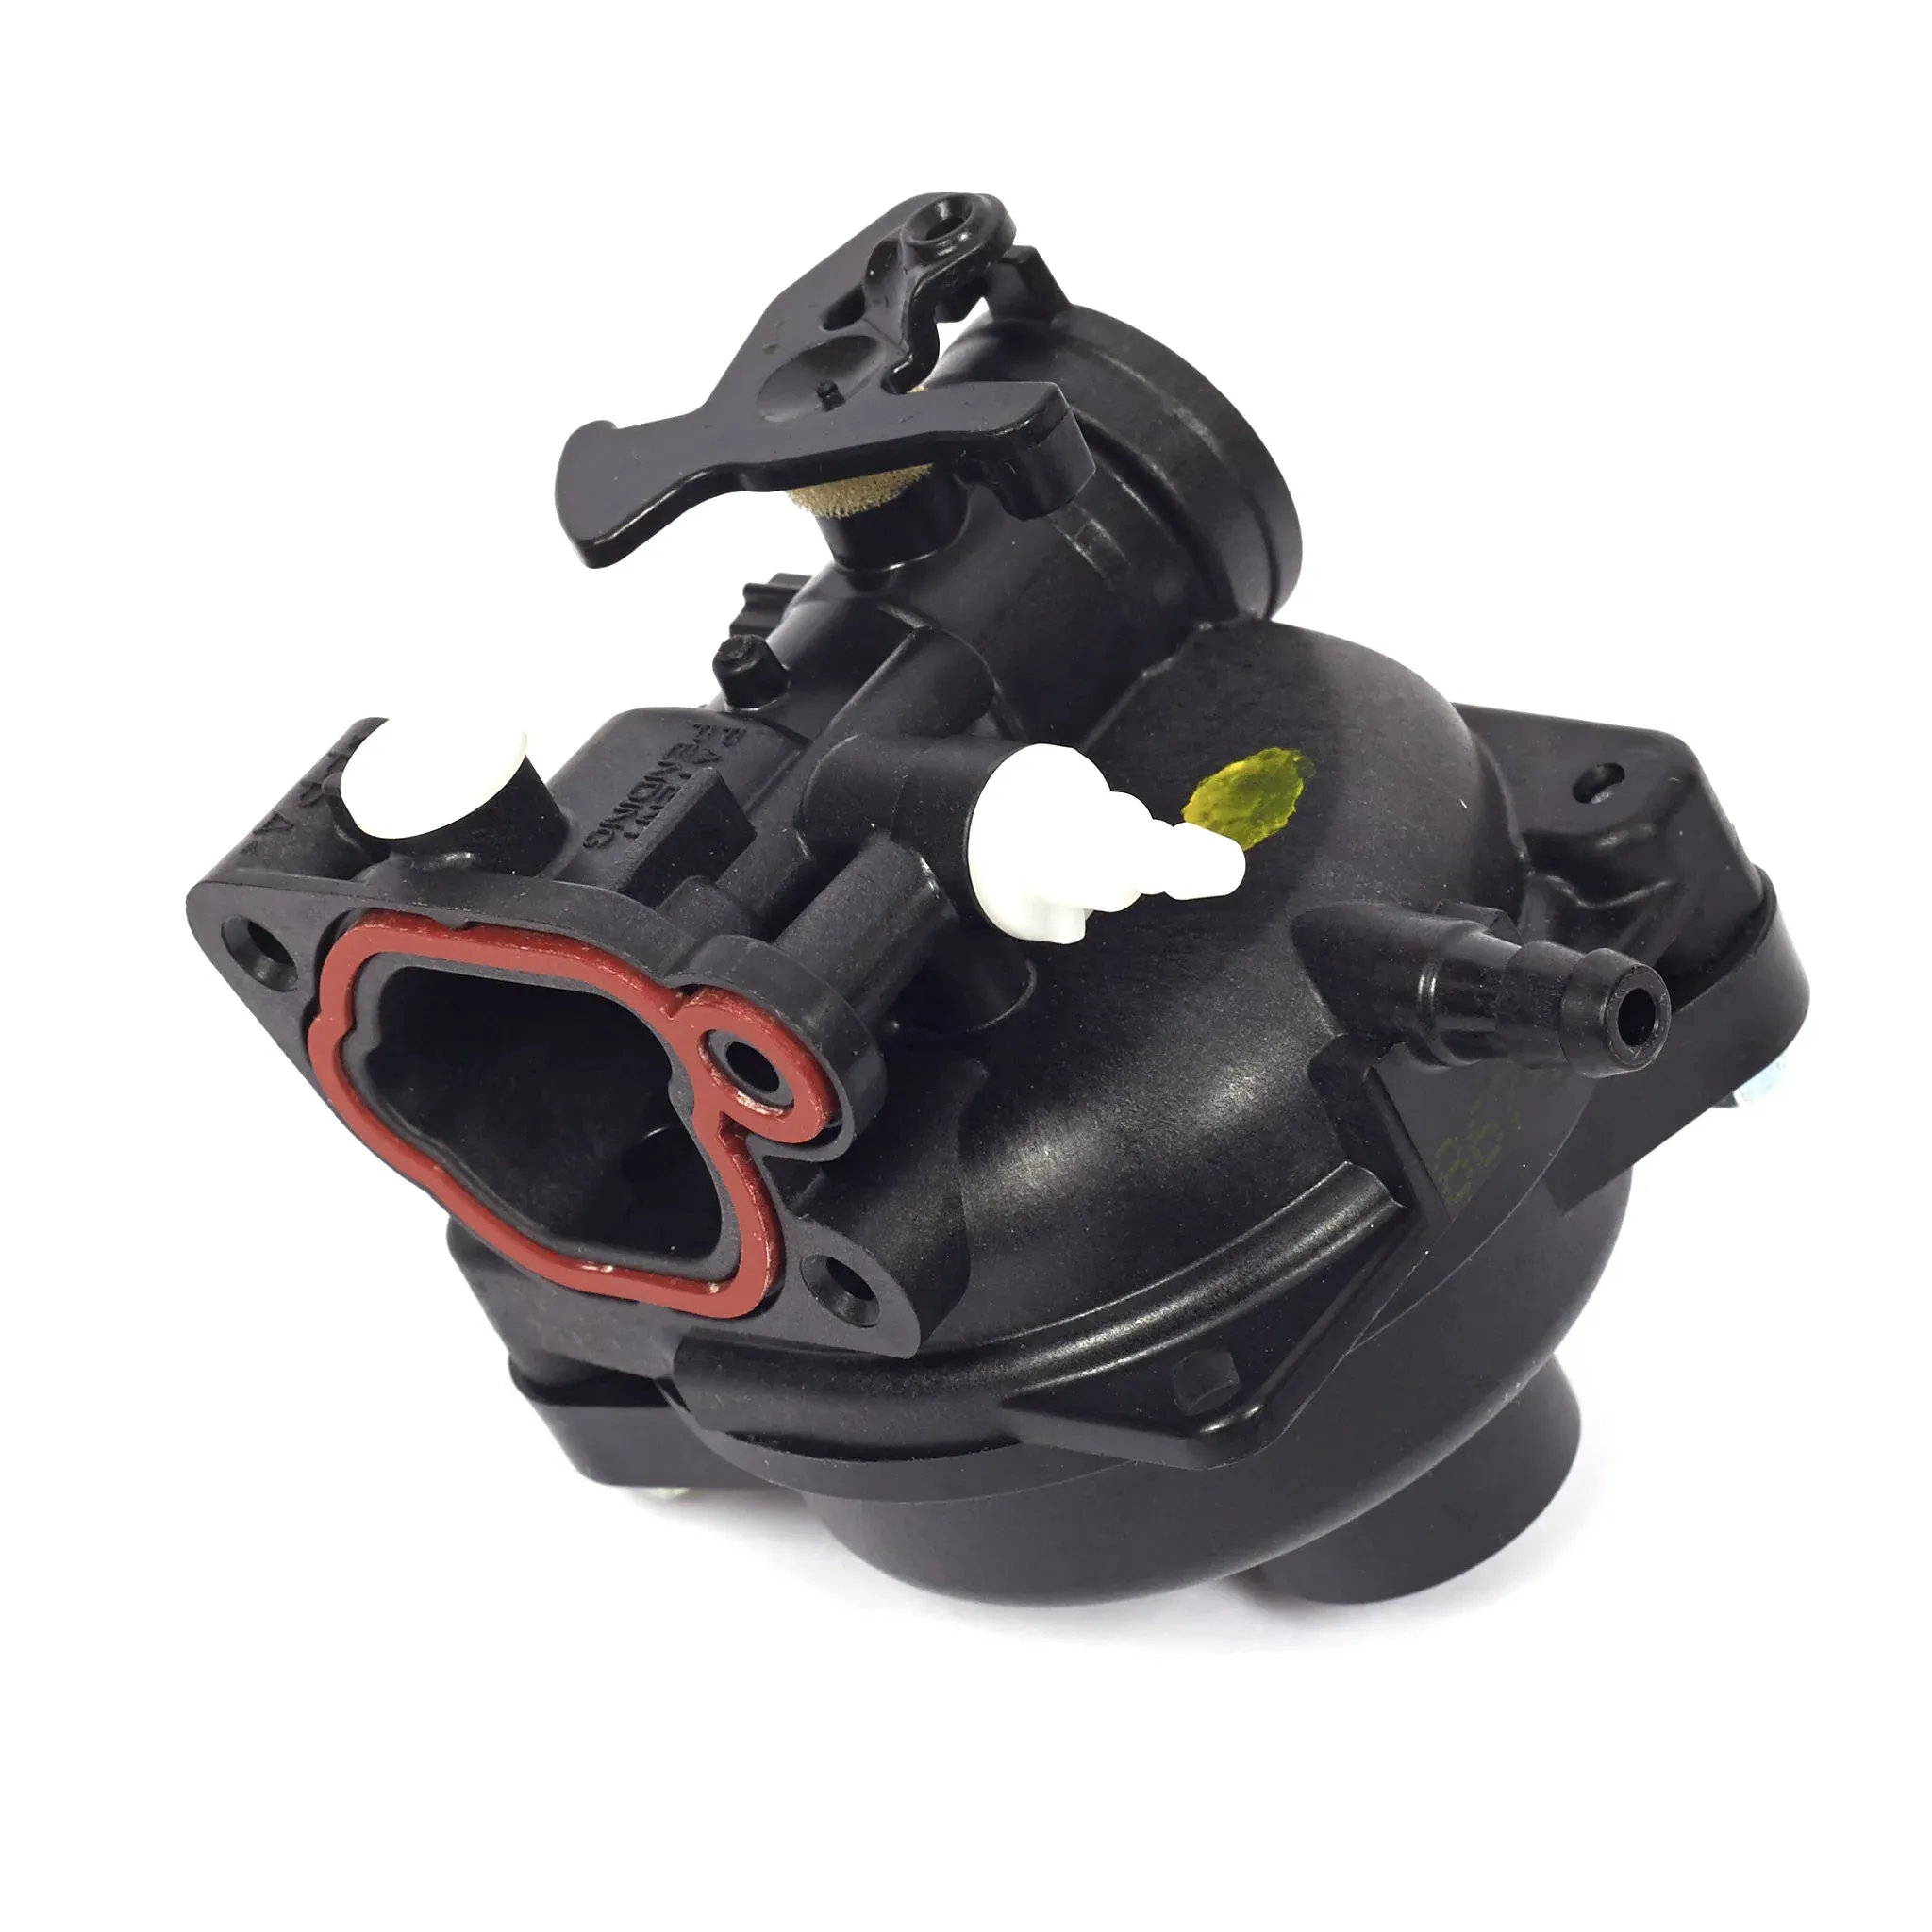
Carburetor Identification
The E-Series uses a very simple carburetor design.
Key Features:
- Integrated plastic body with metal components
- Primer bulb on top (part of air cleaner base)
- Single mounting bolt
- No adjustable mixture screws
- Float-style fuel metering
Part Number Cross-Reference:
| Number | Application |
|---|---|
| 799583 | Primary number for E-Series |
| 593261 | Alternative/earlier |
| 595656 | May interchange |
| 591109 | Verify fit before ordering |
Price Range:
- Genuine: $25-40
- Aftermarket: $10-18
Given the low cost of these carbs and the engines they serve, replacement usually makes more sense than extensive cleaning.
Common Problems
Won’t Start - Primes But No Fire
You push the primer 5 times, pull the cord and nothing happens. Maybe a single pop.
What’s happening: Fuel isn’t reaching the combustion chamber through the main circuit.
Fixes:
- Check that fuel is reaching the carburetor (disconnect line, fuel should flow)
- Verify bowl has fuel (remove bowl bolt briefly)
- Main jet likely clogged - clean or replace carb
Starts Then Immediately Dies
Fires for 1-2 seconds on primer fuel then dies.
What’s happening: Primer delivers fuel directly but the bowl/main jet can’t sustain operation.
Fixes:
- Clean main jet and emulsion tube
- Check float for sticking
- Replace carburetor if cleaning fails
Runs But Surges Constantly
RPM goes up and down rhythmically. Classic governor hunting symptom.
What’s happening: Engine is running lean, governor compensating.
Fixes:
- Clean all fuel passages
- Check for air leak at carb gasket
- Replace gasket between carb and intake
Black Smoke and Rough Running
Engine smokes and runs poorly. Spark plug fouls quickly.
What’s happening: Too much fuel reaching engine.
Fixes:
- Check choke operation - should open fully when running
- Inspect float and needle
- Replace carb if float or needle damaged
Leaking Fuel From Primer Area
Gas drips from the top of the engine near air filter.
What’s happening: Primer grommet or seal failed.
Fixes:
- Replace primer bulb assembly
- Check gasket beneath primer base
- Inspect for cracks in plastic housing
Replacement Guide
These carbs are among the easiest to replace. Total time: 10-15 minutes.
Tools Needed
- 3/8” socket or wrench
- Flathead screwdriver
- Shop rag
Step-by-Step
1. Disconnect spark plug wire
Safety first. Pull the boot off.
2. Remove air filter cover
Usually a single screw or clip. Lift off cover.
[NEED REAL IMAGE: Air filter removal on E-Series engine]
3. Remove air filter
Foam element lifts out. Note: the primer bulb may be integrated into the air filter base.
4. Remove air filter base/primer assembly
This is typically held by the same bolt that mounts the carburetor. Remove it to access the carb.
5. Shut off or clamp fuel line
These mowers rarely have shutoff valves. Clamp the line or be ready with a rag.
6. Remove carburetor mounting bolt
Single bolt in the center. Support the carb as you remove it.
7. Pull carburetor off
Slide it off the intake tube. Disconnect the fuel line.
8. Note gasket position
There’s a gasket between carb and intake. It may stick to either surface.
9. Install new carburetor
New gasket, slide carb on, start bolt by hand.
10. Reinstall primer/air filter base
Make sure primer bulb seats properly.
11. Reconnect fuel line
Push it on firmly.
12. Test
Prime 3-5 times. Should start in 1-3 pulls.
Cleaning Procedure
Worth attempting before buying a new carb, especially if you just want to get through the season.
Quick Clean Method
1. Remove the bowl
Single bolt on the bottom holds the bowl. Catch the fuel.
2. Spray carb cleaner into all passages
Main jet hole, idle passages, fuel inlet. Let it soak 5 minutes.
3. Blow out with compressed air
Every hole and passage you can see.
4. Clean the bowl bolt
The main jet is often integral to the bowl bolt on these carbs. Clean its small holes thoroughly.
5. Reassemble and test
This works about 50% of the time for carbs that are just gummed up.
Deeper Clean
1. Remove float and needle
Push out the hinge pin. Lift float assembly.
2. Soak in carb cleaner
Metal parts only. Plastic primer components don’t soak.
3. Clean emulsion tube
The tube that the main jet feeds into. Clear all tiny holes.
4. Replace bowl gasket
Usually needs replacement if disturbed.
5. Reassemble
Check float movement before buttoning up.
Troubleshooting Tips
The Bowl Has Fuel But Engine Won’t Start
Fuel is getting to the bowl but not into the engine.
Check:
- Main jet in bowl bolt - is it clear?
- Fuel passages in carb body - spray cleaner through
- Float position - should drop freely when fuel empties
Primer Doesn’t Feel Like It’s Doing Anything
No resistance when pushing primer bulb.
Check:
- Primer bulb for cracks (very common)
- Primer bulb grommet seal
- Air leaks in primer passages
Runs Better With Air Filter Removed
Engine runs stronger without air filter.
Check:
- Air filter cleanliness
- Air filter housing for blockage
- This often indicates the carb is slightly lean - may be normal
Engine Revs Up and Won’t Slow Down
Throttle stuck or governor linkage problem.
Check:
- Throttle cable adjustment
- Governor spring connection
- Governor arm binding
- This is usually not a carb issue
When to Replace vs Clean
Replace When:
- Plastic body cracked
- Carb is 5+ years old
- You’ve cleaned it twice already
- Aftermarket carb costs under $15
Clean When:
- Just gummed up from winter storage
- Carb is relatively new
- You’re trying to finish the season
Given that an entire new carburetor for these engines costs $10-15 aftermarket, replacement is often the most practical solution.
Preventive Care
Keep this carburetor running longer:
- Use fuel stabilizer in every tank
- Run the tank dry before storage
- Don’t use gas older than 30 days without stabilizer
- Replace fuel lines if they look cracked or hard
- Store mower inside or under cover
Frequently Asked Questions
Why do these carbs fail so often?
The E-Series carbs are basic designs on budget engines. Combined with ethanol fuel that deteriorates quickly, they clog easily. They’re designed to be replaced rather than rebuilt.
Can I upgrade to a better carburetor?
Not really. The engine is matched to this carb. Putting a different design would require significant modification and isn’t worth it on these mowers.
Aftermarket vs genuine - does it matter here?
For E-Series carbs, aftermarket is fine. The genuine part isn’t significantly better for this price point.
How long should this carburetor last?
With fresh fuel and stabilizer, 5-8 years is reasonable. With neglected fuel, 1-2 seasons is common.
E-Series carburetors are designed as disposable items on economy mowers. Don’t spend hours cleaning one - if it doesn’t respond to a quick clean, replace it and move on.